Lightroom Profiles are a feature of Lightroom Classic, introduced in April 2018, which allow specific colour profiles to be applied to an image non-destructively They are different to Presets because they do not move any of Lightroom's adjustments, so all adjustments can still be used after a profile is applied. They can be thought of as being similar to using different film makes in a film camera, where each film type produces it's own colour characteristics. They allow effects to be used in Lightroom which previously could only be used in Photoshop, such as colour lookup tables.
Location
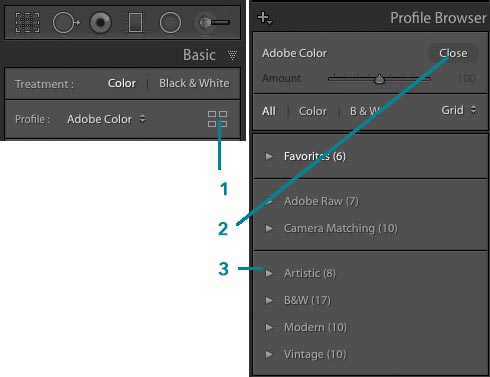
The Profile Browser is located in the Develop Module, under the Basic Tab, and is opened by clicking on the icon with four boxes, shown in 1. The Profiles which you have loaded are shown in 3. To close the Profile Browser and return to the Basic Tab, click the Close Button, shown in 3.
Information
Each image must have one profile assigned but only one profile can be used at a time. It is non-destructive and can be changed at any time.
Adobe Profiles
Available from the drop down list are - Colour, Landscape, Portrait, Standard, Monochrome, Browse.
Available by clicking on the squares - Favourites, Adobe Raw, Camera Marching, Artistic, B&W, Modern, Vintage.
Using Photoshop Profiles in Lightroom
Any Colour Grades that you have produces in Photoshop can be saved as a LUT and imported into Adobe Camera RAW within Photoshop and saved from there. This will then appear as a Profile in Lightroom.