Related Articles
Location
- Menu > Image > Adjustments >
Introduction
- This is a destructive editing process, and you can't make a Smart Object of the image to make this changeable in future.
- It is a sort of combination of two functions, Colour Range and Hue/Saturation.
- To revert portions of the image that you don't want to change you can use the History Brush.
- An alternative is to use the Select Colour command and then use the Hue/Saturation Adjustment Layer. However this does not allow you to use the precise Colour Picker to select an exact colour, but has the advantage of being an Adjustment Layer which you can mask.

Functions
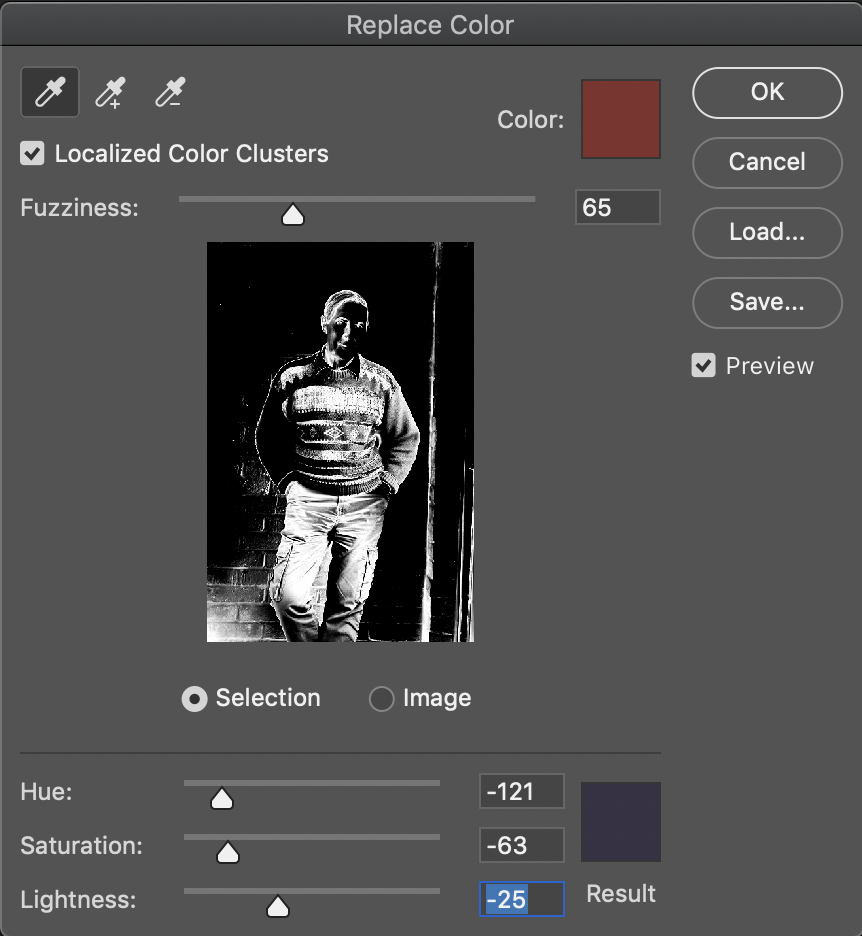
- The first eye dropper selects the base colour and the other eyedroppers can add or subtract from this.
- Fuzziness controls the colour range to be close or broad from the original colour.
- The Result colour can be adjusted from the HSL control sliders or clicked on to give the Colour Picker, where you can select the colour you want, and even enter numerical values to give an exact colour. It also gives you a colour picker curser to pick colours from this or another image.
Resources
- Adobe Photoshop Mastery: Colour & Tone by Ben Willmore (Creative Live paid course). 5 Hue & Saturation Adjustments 1:13:29.

